

Creating Vlocity Records with Ease: A Guide to Salesforce Vlocity Industries Product Configuration
Salesforce is a powerful tool used by many organizations for customer relationship management. However, entering data into Salesforce can be a tedious task, especially when dealing with picklist values. If you are struggling with entering picklist values in Salesforce Vlocity Industries Product Console, then the Salesforce Inspector can come in handy.
The Salesforce Inspector is a Chrome extension that allows you to view and edit data in Salesforce. With this tool, you can easily insert records into Salesforce Vlocity Industries Product Console without the need to enter each picklist value manually. Here is a step-by-step guide on how to use Salesforce Inspector to insert records in Vlocity:
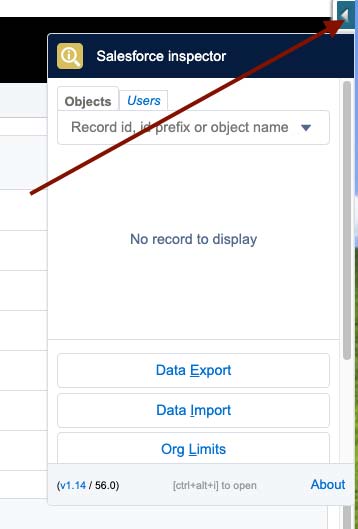
- Install the Salesforce Inspector Chrome extension.

- Open the Vlocity Industries Product Console and Create a picklist where you would like to insert values
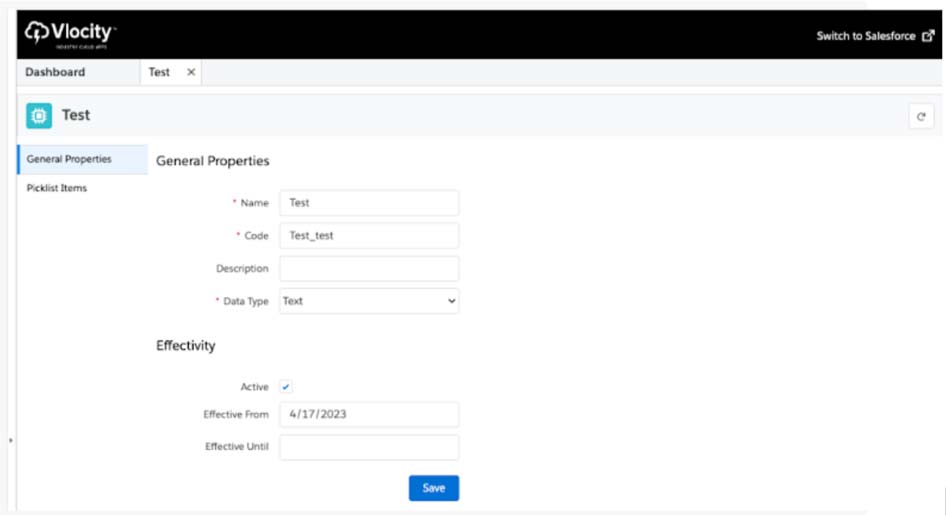
- Use this query to find the ID of the pick list you created and copy the ID for inserting pick list values
Select Id, Name from vlocity_cmt__Picklist__c where name = ‘Test’
- Right-click on the Screen and select “Inspect Element” from the menu and select Data Import
- Create a CSV file with all the required fields for the object you are trying to insert (in our case Vlocity pick list values here is the example csv template).
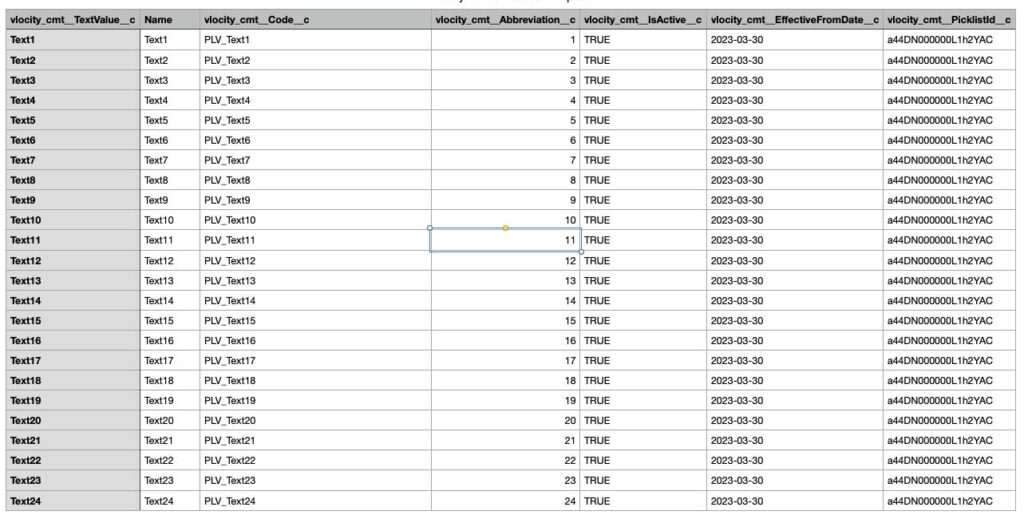
- Copy paste the csv file into the data input field Map the CSV fields to the Salesforce fields. Make sure that the field names match.
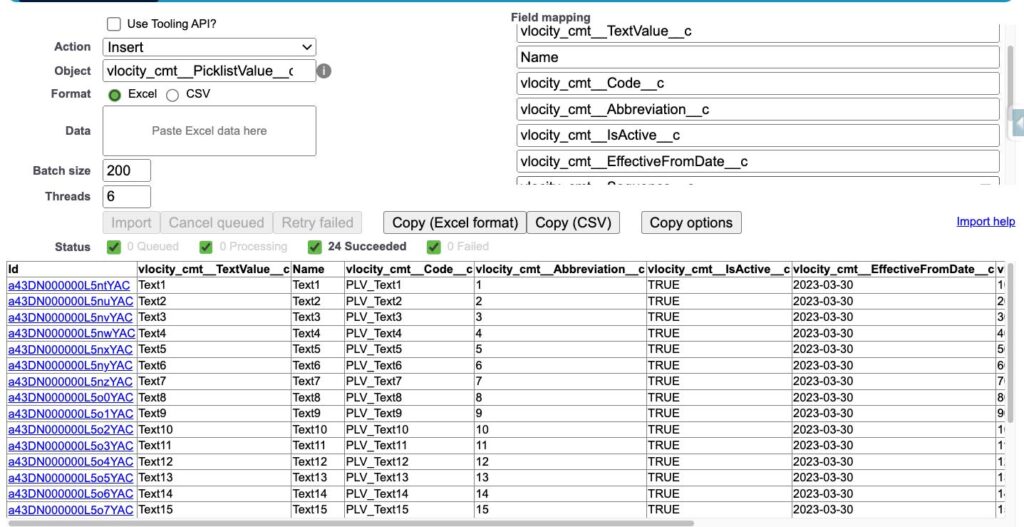
- Click on the “Insert” button to insert the records.
Using the Salesforce Inspector to insert records using CSV can save you time and effort. By using a spreadsheet application, you can easily add multiple records and make changes before inserting them into Salesforce. This can be particularly useful if you are dealing with a large number of records or if you need to make bulk updates.
With just a few clicks, you can enter multiple picklist values without having to navigate through different screens. This can be particularly useful if you are dealing with a large number of records. By using this tool, you can streamline your workflow and improve your productivity.
Additionally, creating multiple picklists is also possible using the same method, or for any object in Salesforce for that matter. This can be particularly useful when dealing with large amounts of data. By following these Salesforce Vlocity configuration best practices, you can save up to 97% of configuration time.
Other Salesforce tools like Vlocity Product Catalog, Vlocity CPQ, and Vlocity DataRaptor can also help streamline your workflow and improve your productivity. With the right Salesforce data management and record creation tools, you can optimize your Salesforce workflow and save time and effort.
If you’re looking for more Salesforce productivity tips and best practices, be sure to check out our blog. And remember, always test any data insertion or changes in a sandbox environment before attempting to do so in a production environment. . For expert guidance and support, Palladin Technologies is here to help you optimize your Salesforce implementation.
This post partially created with the help of Chat GPT.
Learn More About Partnering With Us!